So your Xbox 360 is telling you to “Open Tray” even though the tray is clearly shut. You eject it, close it again, and… same error. Maybe you’ve tried a few different games, unplugged everything, said a few choice words at your console – still nothing.
I get it. I’ve seen this exact issue hundreds of times at our repair shop, and honestly, it’s one of the more annoying Xbox 360 problems because the console is basically gaslighting you about whether the tray is open or not.
Here’s the thing though: this error usually doesn’t mean your Xbox is completely dead. Most of the time, it’s something you can actually fix. Let me walk you through what’s actually going wrong and how to get your console reading discs again.
Common Reasons Why Your Xbox 360 Won’t Read Discs
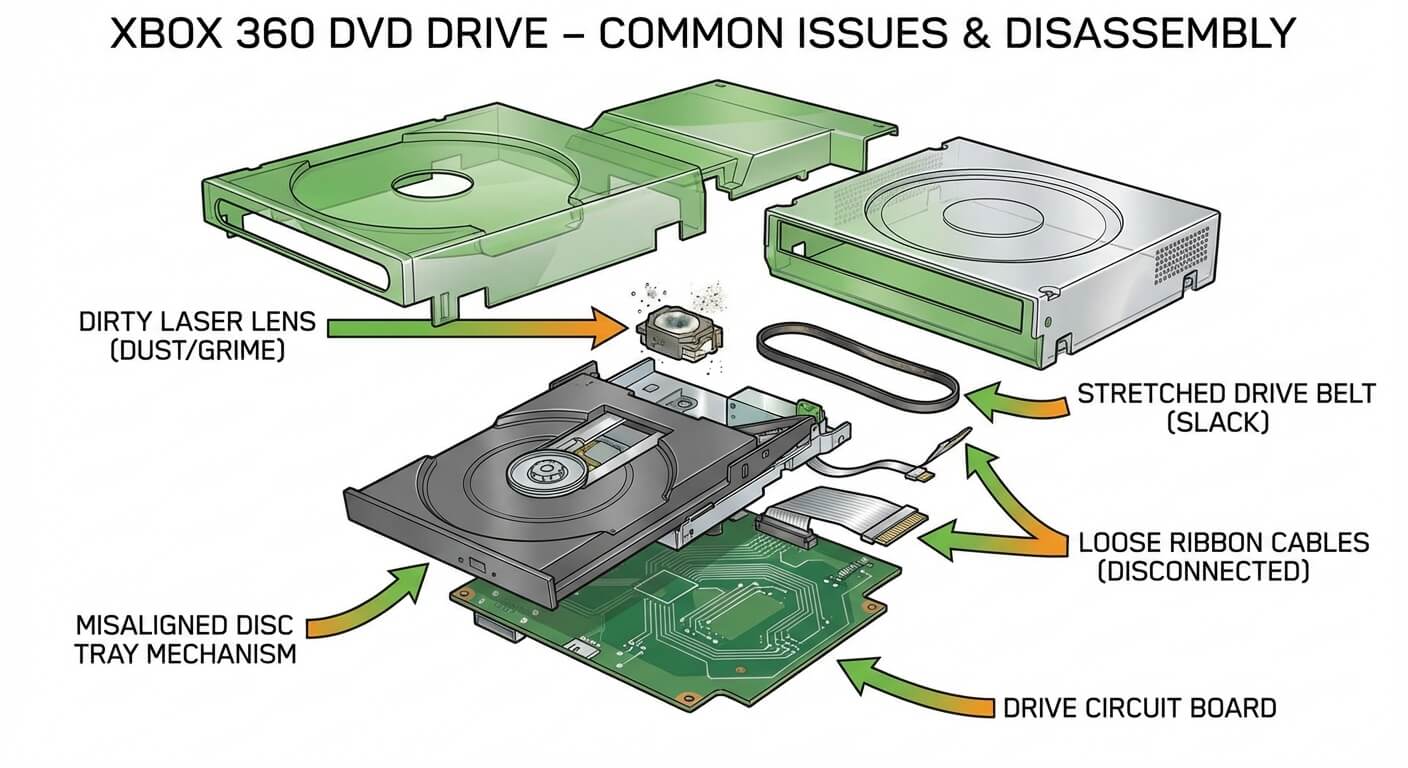
Disclaimer: This is just an illustration. It does not accurately represent how the internal device components look.
The “Open Tray” error on a closed disc tray typically indicates one of several issues with your console’s optical drive:
- The laser lens is dirty or failing – After years of use, dust accumulation or laser degradation prevents the drive from reading discs properly.
- The drive belt has stretched or broken – The rubber belt that moves the laser assembly can wear out over time, causing read failures.
- Disc tray alignment issues – If the tray isn’t closing properly or the disc isn’t sitting flush, the laser can’t focus correctly.
- Damaged or loose ribbon cables – Internal connections between the drive and motherboard can become loose or corroded.
- Drive firmware corruption – Less common, but software issues within the drive itself can trigger this error.
Understanding which issue you’re dealing with is crucial for the right fix. Let’s start with the simplest solutions first.
Quick Fixes to Try First
Before diving into complex repairs, try these straightforward troubleshooting steps:
1- Clean the Disc Thoroughly
Sounds obvious, but scratched, dirty, or damaged discs are often the culprit. Hold the disc by the edges and wipe from the center outward (never in circles) using a soft, lint-free microfiber cloth. If you see deep scratches, that disc might be beyond saving – but your console is likely fine.
2- Test Multiple Discs
Try at least 3-4 different game discs. If only one disc fails, the problem is with the disc itself, not your Xbox 360. If all discs fail, we’re dealing with a console issue.
3- Power Cycle Your Console
Completely power down your Xbox 360, unplug the power cable, and wait 30 seconds. This clears the cache and can sometimes reset minor drive glitches. Plug it back in and test again.
4- Check the Disc Tray Position
Open and close the tray manually several times. Listen for unusual grinding, clicking, or struggling sounds. The tray should glide smoothly without resistance. If you hear concerning noises, the drive mechanism may be damaged.
5- Try the Disc in Different Orientations
With the Xbox 360 lying flat (horizontal position), test your disc. Then try standing it vertically. Sometimes the drive reads better in one position due to bearing wear or alignment issues.
Cleaning the Laser Lens
If basic troubleshooting didn’t work, a dirty laser lens is the next likely suspect. The DVD drive laser collects dust over time, reducing its ability to read discs.
What you’ll need:
- Cotton swabs
- Isopropyl alcohol (90% or higher)
- T8 and T10 Torx screwdrivers
- A clean, well-lit workspace
The process:
- First, unplug your Xbox 360 and remove the faceplate and side panels. Use your Torx screwdrivers to remove the case screws – there are several hidden under the rubber feet and warranty stickers.
- Once inside, locate the DVD drive (it’s the large component at the front). You’ll need to remove it by disconnecting the power and SATA cables, then unscrewing the drive mounting brackets.
- Open the DVD drive carefully – additional small screws are holding the top cover. Inside, you’ll see the laser assembly on a metal rail. The lens itself is a small blue or clear glass component.
- Dip a cotton swab in isopropyl alcohol, remove excess liquid, and gently dab the lens. Never scrub or apply pressure – you can damage the delicate lens coating. Let it air dry completely before reassembling.
🚨 Important: If you’re uncomfortable with this level of disassembly, our mail-in repair service makes it easy to send your console to us. We’ll clean, diagnose, and repair it, then ship it back within 2-4 business days with free standard shipping (express delivery is also available for an extra charge).
Adjusting the Laser Potentiometer (Advanced)
When cleaning doesn’t work, the laser itself might be weakening. DVD drive lasers have a small adjustment screw called a potentiometer that controls laser strength. Turning this can sometimes restore reading capability.
Critical warning: This is a delicate adjustment. Turn the pot too far, and you’ll permanently kill the laser. Proceed at your own risk.
With the DVD drive opened, locate the small variable resistor near the laser assembly – it’s usually a tiny screw with a cross or flathead slot. Using a precision screwdriver, turn it clockwise in very small increments (1/16 turn at a time).
After each adjustment, reassemble enough to test. If you’ve made several small adjustments without improvement, stop – the laser is likely beyond saving and needs replacement.
Replacing the Drive Belt
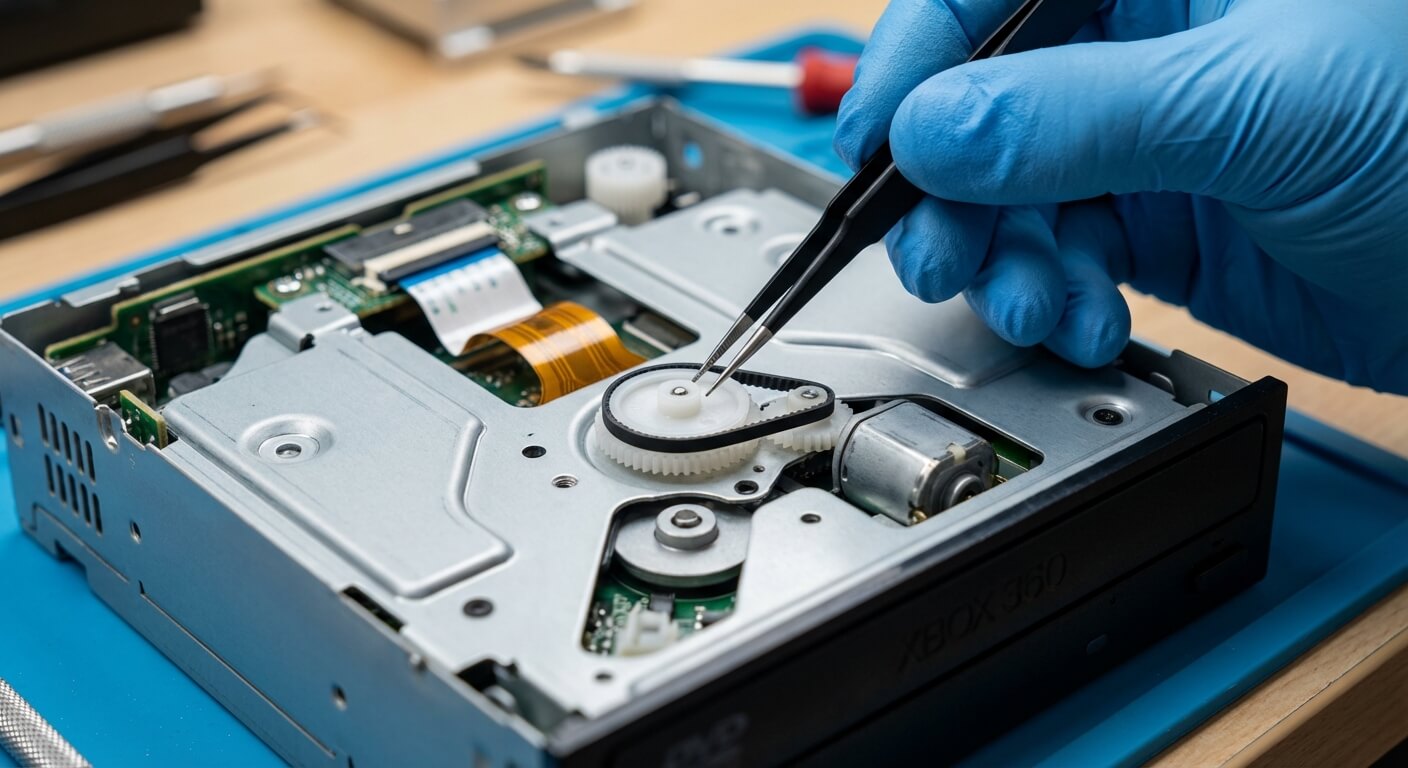
The rubber belt that moves the laser assembly along its track can stretch or break, especially in older consoles. When this happens, the laser can’t position itself correctly to read discs.
You’ll notice this issue if:
- The laser doesn’t move when you insert a disc
- You hear the drive motor running but nothing happens
- The laser is stuck at one end of the track
Replacement belts are inexpensive (under $5 online), but replacing them requires complete drive disassembly. If you’ve already opened the drive to clean the lens, the belt is right there – it loops around the motor gear and the laser sled.
Simply remove the old belt and stretch the new one into place. Make sure it’s seated properly on both the motor gear and sled pulley, with no twists.
When to Replace the Entire DVD Drive
Sometimes the drive is simply beyond repair. Common signs include:
- Loud grinding or clicking that persists after cleaning
- The tray won’t open or close at all
- Multiple repair attempts haven’t worked
- Physical damage to the drive mechanism
Replacement drives are available online, but here’s the catch: Xbox 360 DVD drives are married to the motherboard through firmware. You can’t simply swap in a new drive without also swapping or reflashing the drive’s PCB (printed circuit board) with your original firmware.
This process requires specialized tools and knowledge. Unless you’re experienced with console modding, this is where professional repair becomes the smarter choice.
Model-Specific Considerations
Different Xbox 360 models have slightly different drive mechanisms:
- Original Xbox 360 (2005-2010): Uses Hitachi, Toshiba-Samsung, or BenQ drives. These are the most problematic, with high failure rates due to poor cooling and design issues.
- Xbox 360 S (Slim, 2010-2013): More reliable Lite-On drives, but still susceptible to laser wear and belt issues.
- Xbox 360 E (2013-2016): Most reliable of the bunch, though not immune to the problems we’ve discussed.
The repair approach is essentially the same across models, but opening the case differs slightly. The original model has a particularly frustrating case design with hidden clips.
Is It Worth Repairing an Xbox 360?
This is a fair question, especially given the age of the Xbox 360. Whether repair makes sense depends on:
- Sentimental value: Do you have a library of physical games you still enjoy? Digital purchases tied to your account?
- Repair cost vs. replacement: A professional drive replacement typically runs $60-100. Compare that to buying a used Xbox 360 (anywhere from $50-150 depending on model and condition) or upgrading to a current-gen console.
- Game library considerations: If you’ve invested heavily in Xbox 360 games, maintaining a working console makes sense. Many titles aren’t backward compatible with newer Xbox consoles.
⭐ Use our Xbox 360 price calculator to see what your specific model is worth in working condition. This can help inform your repair-or-replace decision.
Final Thoughts
The “Open Tray” error on your Xbox 360 is frustrating, but it’s usually fixable. Start with the simple solutions – clean your discs, test multiple games, and try a power cycle. If those don’t work, cleaning the laser lens or adjusting the potentiometer might do the trick.
For more complex issues like drive replacement or when you’re simply not comfortable with DIY repairs, professional help is your best bet. At Gizmo Pros, we’ve been fixing electronics for over 15 years across our three Florida locations, and we can get your Xbox 360 back to gaming condition quickly.
Now get back to gaming – those achievements aren’t going to unlock themselves!